DIY Applying Vintage T-Shirt Iron-On Transfers in 5 minutes
Posted by Admin IOS on
So, you're a Retro Fashion and Thrift Store thrifting superstar, right? It's one of your things... You'll enjoy our selection of 70s and 80s vintage iron ons. After you select your transfer, you'll want to apply it to a garment. Here's a how-to. Have fun!
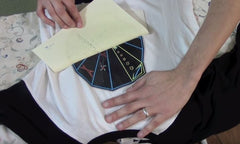
Sample Directions to adhere transfer to your t-shirt or garment
After 30+ years in the vintage clothing industry and selling 1970s t-shirt iron-on transfers to you all, I have met only a few people who claim to have a professional heat transfer machine. That suggests to me that most (if not all) of our happy clients use a standard home iron and ironing board to adhere the transfer to the chosen t-shirt or garment. (handbags, denim jackets, hoodies, tees, etc.) Yep, simple. Five minutes, a garment of your choice, a home iron, and an iron-on. Does this make sense?
In current times, our daughters are thrifting with their friends looking for these items. Thrift shops make the fashion hunt super fun yet likely won't have what you are looking for exactly. We hope our selection provides some direct hits for you for creating that 70s and 80s look, or to take you for a walk down memory lane.
Again, it really is easy and quick. So, below is a generic set of directions for you to consider that work great for completing your project. This will give you the confidence you need to get it done right. A couple minutes and wallah!
Remember, for further information, searching Google will provide lists of directions, even Youtube videos have amateurs making "how to" videos for the DIY fashionista. Hey, there is likely a t-shirt shop down the street from you, every town has one. They are happy to do it for free or a few bucks too. Be nice and ask them.
Disclaimer: These are generic directions and corporate lawyers would say "tell them to use a professional." Consider this isn't rocket science and 'everyone is doing it', plus it's fun and you will look great too :-)
When you are done, consider emailing me and sharing your story and picture of the completed garment. Thank you!


PRINTING INSTRUCTIONS


1. Use only on cotton or cotton-polyester blend fabrics (note: in the 60s/70s it was 50/50 Screen Stars (the old American Apparel popular shirt) but the experts say shirts are even better now!)
2. Set your heat transfer machine at 350-375 Fahrenheit. (check google for altitude changes... just kidding. ;-)
3. Smooth wrinkles and remove any lint or foreign material from the surface of the garment to be printed. (especially crumbs or chocolate stains)
4. Place Roach transfer in desired print position with the printed side down against the garment. (or it may not work right, right?)
5. Lock the heating head into printing position for 15 seconds, making certain pressure setting is adequate for good adhesion to the garment. (I always say, hold it long and hard but don't burn it!)
6. Release the heating head and return to its open position. Do not raise the heating head too rapidly or the transfer paper may also raise slightly and separate the ink from the fabric while it is still hot and in a semi-liquid state. (be careful!)
7. Carefully remove the garment and allow it to cool completely before removing the transfer paper. (Mom always said about her apple pie, "let it cool first" - makes sense right?)
8. Remove the transfer paper in a slow even motion by pulling from a corner, diagonally across the design. (rip the band-aid, wait, don't!)
9. Garments should be laundered without bleaching agents. (or Coca-cola)
Have fun, and as always, share the stoke with your friends! You'll look fabulous!
Have a fabulous day.
IRONONSTATION.COM
Find us on Facebook (www.facebook.com/irononstation)
Share this post
- 0 comment
- Tags: 1960s, 1970s, 60s, 70s, applying, directions, diy, heat press, iron-on, t-shirt, tees, transfers, vintage, vintage fashion blog
0 comment